Written by MARK GEARDING and originally published in Quality Magazine. Visit the original article at https://www.qualitymag.com/articles/94252-taking-measure.
Today’s on-the-go-consumers demand products that can multitask, from portable meal kits and one-minute makeup to smartphones that can measure your heartbeat or control your thermostat. Pocket-sized, titanium survival tools equipped with items like a knife, screwdriver, flashlight and can opener have joined the ranks as common, everyday carry items.
On manufacturing and production floors coordinate measuring machines (CMMs) are also being asked to multitask and to share the workload with other measurement tools like gages and comparators. While tool choice remains dependent on application, accuracy and part shape, market drivers are also influencing equipment selection.
For example, aerospace parts production and inspection is being offloaded to a larger number of suppliers including smaller companies. Faster deliveries and tighter accuracies for the thousands of mechanical parts that have to be inspected before assembly means CMMs have to be faster and more accurate.
But that’s not the only challenge. Long, heavy parts like airframe structures and spars are hard to measure because of their form. Higher volume, large components with close tolerances typically require a large bridge or gantry CMM. For these fabricators, noncontact, touch trigger and scanning analog probes each hold a special place in the toolbox.
On the automotive front innovation is changing the way parts are made. Driver assist technologies, 3D laminated glass, sound driver alerts and call out safety aids are just a few. Domestic and commercial transportation OEMs are juggling these technology advances with the ongoing need to improve fuel efficiency and emissions control. As a result, the market for car makers has become highly competitive with tightening margins and shorter turnaround times for production processes, higher accuracy requirements and the integration of automated manufacturing processes to reduce cycle times.
The need to optimize throughput is a common denominator across industry lines. Boosting output can mean investing in both a CMM and air or electronic gaging. Equipment selection can be fine-tuned by taking a look at inspection requirements. Checking part geometry calls for a laboratory grade CMM. But before a purchase order is signed, it’s important to take a look at design and construction—elements that can affect accuracy and reliability.
Unlike DC servo motors or a belt and pulley design, a linear motor-driven CMM has no moving parts. It works off permanent magnets that don’t wear out. Electronic signals are sent to the motor, using the natural force of the magnet to generate a small magnetic field that interacts with the magnets. The result is precise positioning and reliability along with little to no maintenance.
A granite work plate and an aluminum mobile bridge are materials that offer higher rigidity and lower inertia. Use of aluminum for components like the Z-axis ram give a manufacturer the flexibility to use a variety of motorized probe heads.
An aluminum carrier to hold a CMM’s optical scales can help minimize margin of error. While some models incorporate the use of dissimilar materials such as composites and steel, aluminum components offer greater stability.
To meet the market’s demand for a multi-solution machine, a lab-grade CMM should be able to support touch or noncontact inspection. A precision measuring head that can collect massive amounts of data quickly as well as provide infinite positioning and 5-axis motion is key to achieving optimal output. If a touch trigger probe is required, a 5-axis probe can provide throughput that is three times faster than traditional indexing heads.
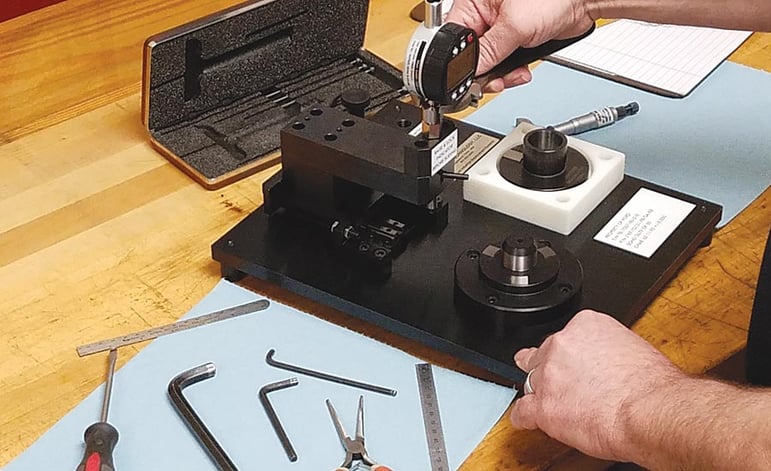
For manufacturers that need a lab-grade CMM with scanning capability yet want to automate a production line and measure parts in real time, a CMM can be teamed with a comparator. Unlike a custom gage designed for one part, a comparator—mounted on a bench top or enclosure—should be able to transition between programs and fixtures in seconds for medium to high volume applications.
The configuration saves steps and improves efficiency. The CMM is able to send data to the comparator which in turn measures the part a robot has removed from production. This allows the device to ‘talk’ to the machining center and provide real time adjustments. With CAD design software support, the CMM can carry out measurements in point-to-point mode, either with contact sensors or via the ‘umbilical’ between it and the comparator.
Another way manufacturers can achieve precise, reliable portable inspection is with a mobile CMM that is equipped with 5-axis measurement capability. Again, design and construction features are important considerations. The unit should be easy to move yet offer the capability to be locked into place. One that is equipped with a 110/220 volt outlet eliminates the need for shop air. Built-in vibration resistance and thermal stability along with mechanical bearings add additional protection from the harsh shop floor environment. Durability and friction-free operation are critical for dependable inspections. A 5-axis touch trigger head can provide repeatable measurements of complex parts and significantly reduce inspection time without sacrificing accuracy.
There are some part inspection scenarios where a CMM—stationary or portable—isn’t the best option. Parts that dictate long reaches or have grooves and spirals typically call for air tooling or gaging. On a Tier 1 automotive supplier’s manufacturing floor, fuel injector components are best measured using air or electronic gaging because of close tolerance requirements—one tenth or less.
Part length or diameter can also dictate selection of a gaging tool. For fabricators that must multitask, CMMs work quite well in tandem with air or electronic gages. An automotive manufacturer that needs to measure parts might use a CMM then switch to a gaging tool if a job calls for each part to be inspected. Custom gages can be built to a company’s requirements with the capability to check an automotive part every three seconds. For parts that can’t be subjected to contact like a rubber gasket, a back pressure system that blows air through an air ring provides true noncontact inspection.
While choosing the right inspection equipment can be challenging, finding an OEM that can build and support each of these options can save considerable time on the front-end of a purchase. Keeping service and support under one roof with an OEM that is customer centric can eliminate an often overlooked source of downtime and production inefficiency.

