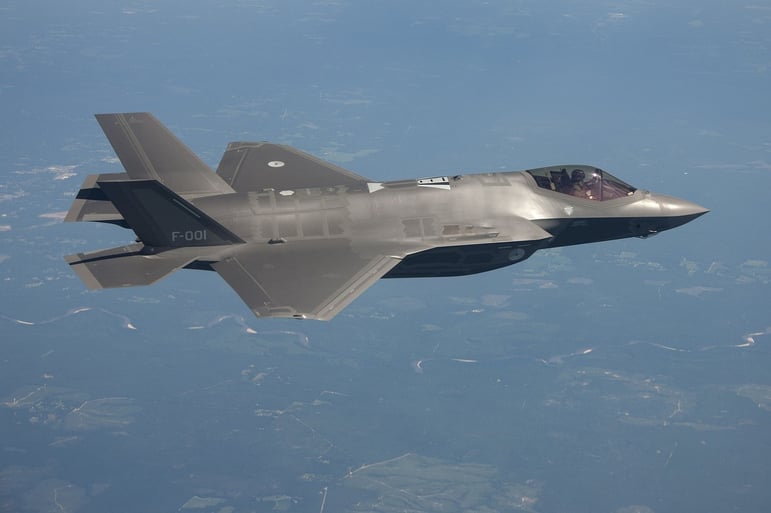
In the market for capital equipment? You’ll want to look at three things before taking the plunge: budget, cash flow and the parts you need to make. It’s equally important to know the markets you support and where they're heading in terms of growth, technology and changes that could impact the way you do business. Let's look at the aerospace industry as an example and the role coordinate measuring machines (CMMs) face in the constant push for faster, streamlined production.
It’s no secret to part suppliers that achieving the required industry qualifications is an arduous and sometimes lengthy process. In fact, this June, the 2009 AS9100 Revision C certification standard will be updated to AS9100:2016. That means all AS9100 audits must be performed to the AS9100:2016 standard. The updates have been designed to:
- Adapt to a changing world
- Enhance an organization’s ability to satisfy its customers
- Provide a consistent foundation for the future
- Reflect increasingly complex environments in which organizations operate
- Ensure new standard reflects the needs of all interested parties
- Integrate with other management systems
CMM OEMs will continue to gain the requisite certifications to do their part in keeping aircraft where they belong—in the sky. Let's take a look at the industries.
Research and Markets’ "Global Coordinate Measuring Machine Market 2017-2021" states that the CMM market alone is expected to grow at a compound annual growth rate (CAGR) of 7% from 2017 to 2021. An increase in applications, particularly the inspection of components and parts, is boosting the uptick. The report describes CMMs as the “preferred option for the 3D measurement of objects in the aerospace, automotive, shipbuilding, medical device and other industries.
The last two decades have seen the aerospace market weather a recession, fuel price fluctuations and security threats. Despite these bumps, global air traffic has grown at a yearly rate of 5.5 %. The aerospace market, particularly the commercial segment, is expected to maintain a steady appetite for CMMs. Requirements for fuel efficiency, environmental regulations dictating reductions in noise and carbon emissions and the ongoing trend for the design and fabrication of lightweight engines means an increase in the need for high accuracy measurements.
It’s estimated that major aerospace manufacturers currently use CMM machines as much as 16 hours a day to measure aerospace components’ physical geometrical characteristics. According to the Deloitte 2017 Global Aerospace and Defense Industry Outlook, the commercial aircraft backlog is at an “all-time high of -13,500 aircraft units” or more than nine and a half years of annual production. Robust global passenger traffic and airline profits (primarily due to lower fuel costs) are expected to drive increases in large commercial aircraft production. The report expects aircraft production to be up by 96 units in 2017 compared to 2016.
Major commercial aircraft OEMS are expected to sustain high order backlogs due to healthy demand for new aircraft. Production levels will remain strong for next-generation models as well. 3D printing combined with CNC machining is expected to play a key role in the market segment due to its ability to create parts that can’t be produced with just one method. However, the combination of processes requires manufacturers to play close attention to testing and measurement.
Where do CMMs come in? Let’s start at the beginning of a 3D printed part. Metrology equipment can be used to test bar and plate stock for subtractive manufacturing but these tests are unable to verify the metal powder used for 3D printing. However, since the process starts with refined metal powder that is only available from a small number of suppliers that optimize powders for their printers, the ‘protocol’ takes the guesswork out of raw material identification for the end user.
Once a part is 3D printed, a fabricator can post-machine it to achieve much closer tolerances for external features. Internal cavities, very small components or the interiors of complex geometry however aren’t machinable, so fabricators need to take this into consideration during the design phase.
Once a part emerges from the printer, the dimensions are measured and checked against the original CAD file. The surface finish of a part created with 3D printing is rough, requiring a fabricator to set aside close tolerances. The part is intentionally oversized so that extra material can be machined off to reach its final dimensions.
Creating a 3D map of the part with a 3D scanner can capture complex shapes with a wide number of points. A fabricator can then compare the “map” to the original CAD drawing to cross check for errors. This is especially important when machining certain features like the thin-walled sections of conformal cooling channels. Renishaw’s RSP3 complements its RSP2 probe, providing its REVO system with 3D-scanning (x,y,z) and crank stylus capabilities. Following printing and measuring, parts are moved to the CNC machining center. After machining, the solid metal part must undergo required mechanical tests such as hardness, tensile strength and surface roughness. A CMM can be employed to perform dimensional measurement of the finished part. A CMM like the Revolution Series Linear Motor CMM equipped with a REVO scanning probe can be programmed to a set of coordinates based on the original CAD drawing, then automatically measure multiple parts in succession and compare the results to original specifications.
Insight into market trends and technologies shaping industries like aerospace are important when it comes to equipment purchases like a CMM. Don’t miss our next blog where we’ll take a closer look at the type of inspection tasks that are being assigned to CMMs .


