Entrepreneur and domestic lifestyle innovator Martha Stewart will be the first to tell you that before you start cooking, you have to have the right staples in your pantry. These items range from baking essentials such as pure vanilla extract, baking soda and cornstarch to items like dried pasta, flours, grains, rice, nuts, oils, sugars, spices and other seasonings. It’s a little bit like that when you sit down at the drawing board to engineer a new machine.
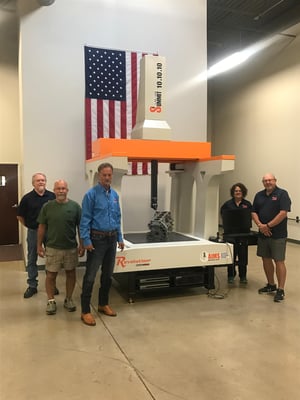
AIMS recently brought new coordinate measuring machine (CMM) technology to the shop floor. The Summit 10.10.10 is a game changer for fabricators in a wide range of industries for applications that range from high volume, large parts inspection to measuring things like coating thicknesses and surface roughness for adhesion. But before we get down to the brass tacks of what makes the Summit tick, we

wanted to take a moment to talk about the “ingredients” that went into the “recipe” needed to create a one-of-a-kind product like the Summit 10.10.10.
We wanted to bring REVO 2 to the production floor without having to use a lab-grade machine to do it. When we developed the Revolution Series HB [the industry’s first mobile 5-axis CMM] in 2015 we gained an understanding of how valuable factory floor real estate is. We wanted to provide fabricators with the largest measuring volume possible while keeping the machine’s footprint as small as possible. That’s the mindset we brought to the development of the Summit. Creation of the Revolution Series LM has given AIMS an in-depth understanding of linear motors. Something we knew the Summit would need to support the 5-axis REVO 2.
In addition to a metrology-based design team that had a grip on what it would take to deliver the technology features customers wanted, a well-grounded service team proved equally important because they provided input on the best way to service a machine. At AIMS, our design and service teams have a total of two centuries of knowledge and experience. Each understands what it means when we talk about measuring to microns. Imagine cutting a strand of hair seven times. That’s a micron.
Once the design and service components were complete, the Summit went to our sister company CMI Technologies where technicians fabricated custom tooling. In 2016 we acquired Englewood, Ohio-based CMI Technologies to control quality and delivery time frames for LM and HB components. CMI also performs machining processes for our CMMs allowing us to control manufacturing and quality under one roof. We know how severe the job shop environment can be. Modular or adjustable tooling isn’t suited to these situations. You have to have fixtures that can stand up to the rigors of operators loading and unloading parts all day. We’re able to design and build custom tooling for our needs and those of our customers.
Following tool design/build, the Summit was handed over to the assemblers. Application engineers wrote the software program used to run Summit and its inspection and measurement functions. These engineers also spend considerable time debugging program once it is written.
It takes a lot more than an idea to bring advanced technology to fruition. We have the field experience, the engineering knowledge, the personnel and customers who give us invaluable feedback. Next week we’ll get into the nuts and bolts of this exciting new machine.

