Etymology traces the word “turnkey” all the way back to the 1650s, where “jailer” was derived from turn [verb] plus key [noun]. Today the word is used in commercial real estate to describe a space for rent or sale that's move-in ready. Manufacturers, though, typically define turnkey as a prefabricated package that contains everything needed to perform a given task.
When it comes to measuring part features, fabricators looking to invest in a coordinate measuring machine should hit pause and start asking questions. For example, can the coordinate measuring machine OEM act as a single source, from purchase order to installation, plus aftermarket support? Typically, pieces and parts of a CMM package are farmed out to different vendors. Most fabricators these days, just like the rest of us, are busy. There's no time to follow up on a machine purchase, contact another source for calibration and service, and find yet someone else for training.
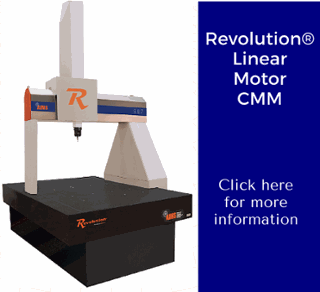
AIMS intentionally chose to make a turnkey solution, starting with the design and production of its own CMMs. The reason? It’s what fabricators need. Even more important? Matching the right equipment with the right job. So what does a turnkey package really look like? We believe it starts with an analysis of parts.
Evaluating a customer’s application starts with a simple question. Will the job require a hard bearing machine, a shop floor unit or a laboratory CMM? The answer is based on tolerance requirements and capabilities. Part prints, for prismatic or freeform components, determine whether features must be scanned or measured with a touch trigger machine.
A CMM equipped with a Renishaw PH20 brings 5-axis measurement capability to touch trigger applications for all CMM sizes. Measurement points can be taken using only the head and not the CMM structure. The Renishaw PH10 heads carry a range of probes and extensions that can be oriented in 720 repeatable positions to provide access to the most difficult-to-reach features. A CMM equipped with Renishaw’s REVO 5-axis measurement system provides high performance scanning, non-contact inspection and surface finish analysis for freeform parts.
Tooling comes next. Part prints highlight features that need to be measured. Tooling can then be designed and built to allow a company to measure part features in just one pass. The operator saves time and eliminates errors because the part doesn’t need to be repositioned. New features can be introduced by simply adding code to the software.
Stocked machines available in inventory, coupled with the capability to design/build a CMM in a reasonable time frame give customers real flexibility. In addition to the expertise and field experience needed to match the right machine with the right job, a comprehensive package includes software, programming, tooling to stage parts, fabrication to support parts, calibration and maintenance services and training. So - the next time you're in the market for a CMM, remember to press pause, and evaluate and consider the true meaning of turnkey.


